Q: I have my central air conditioner and furnace serviced every few years to keep them running efficiently. Is there anything I can do to the air conditioner myself on the off years to improve its efficiency?
A: There are several things you can do yourself to keep a central air conditioner or heat pump running at peak efficiency. Since the furnace air handler (blower) is also used for central air conditioning, maintaining it may also decrease your winter heating bills. A heat pump is actually just a central air conditioner that runs the refrigeration cycle in reverse when heating your home.
Two key factors to keep an air conditioner running most efficiently are making sure it has the proper amount of airflow over the indoor and outdoor coils, and keeping the coils clean. Clean coils transfer heat more efficiently to the air blowing over them, so the compressor runs less to produce the same amount of cooling output.
Before doing any internal maintenance on a heat pump or central air conditioner, always switch off the power to the unit at the circuit breaker panel box. You may also find a large switch near the outdoor unit. Usually, you have to open the switch door and pull a connector bar from it with its plastic handle. If you are at all unsure about how to do this, do not attempt cleaning the unit by yourself.
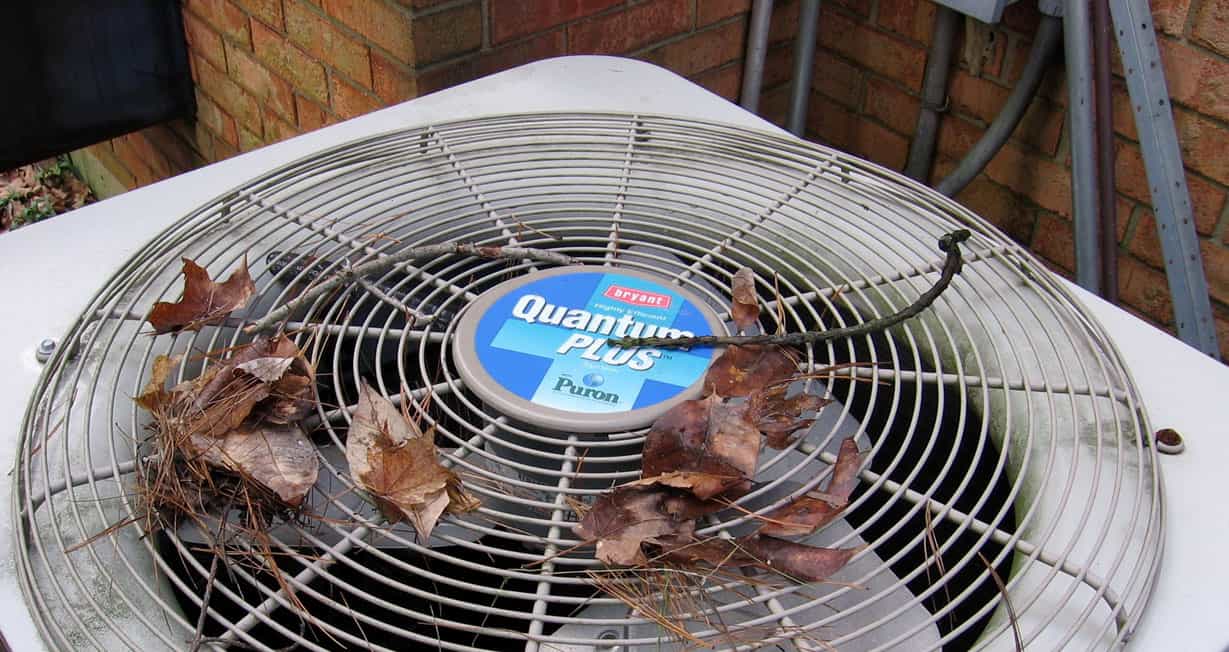
After you turn the power off, remove any items or tools — such as rakes or shovels — that are resting against the outdoor condenser unit housing. These items may interfere with the airflow over the coils inside the unit. Clean off any leaves, pine needles, branches, or other vegetation debris from the top grille. They may blow off on their own when the unit starts running this spring, but it does not hurt to manually remove them.
Look inside the outdoor unit for old leaves and debris that may have accumulated during winter. Debris may reduce efficiency, and it can accelerate corrosion of the steel housing. Remove the screws from the side access panel to remove it. Reach in and clean out the debris.
Be careful not to damage the fragile fins on the coils. If you do bend some together, use the tip of a dull knife to separate and straighten them. It is not important for all of them to be perfectly straight; there just needs to be a gap for airflow between them. Inexpensive plastic fin combs are available to space them more accurately if you choose.
When reassembling the access panel, be sure to adequately tighten the screws. If the screws are not tight, air may be sucked in around the loose panel instead of through the coils. This reduces efficiency. Even if you do not have to clean out any debris, make sure all the exterior panel screws are tight.
Move indoors to the air handler that circulates the air throughout your house. If you have not changed the filter for the past two months, change it now. A dirty air filter may create too much airflow resistance for maximum cooling efficiency.
Remove the screws from the side panel to gain access to the cooling coils. Use your vacuum cleaner brush attachment to clean off any dust. You may have to gently brush it first with a hand brush to dislodge any dirt. Dust may accumulate on the damp indoor air conditioning coils and stick when it dries.
Make sure the evaporator drain is fully open. Pour a cup of water into the water tray under the cooling evaporator coils to test it. The water should run out the tube into the floor drain if it is open. If not, use a wire to clean out the tube until the water flows out.
As with the outdoor access cover, make sure the screws are tight on the indoor air handler. While you are around the ductwork, seal any gaps at joints with tough Gorilla Tape, T-Rex Tape, or aluminum foil tape.
After the tuneup, remember to turn on power to the unit at the breaker panel box. With this minimal DIY effort, you can extend the life and efficiency of your home cooling systems and increase your summer comfort when indoors.